
Set up your ASUS router for WorldNet fibre. The web screenshots show the RT-AC59U. The app method is for ASUS Router app-compatible models; use Web Setup if your model is not supported.
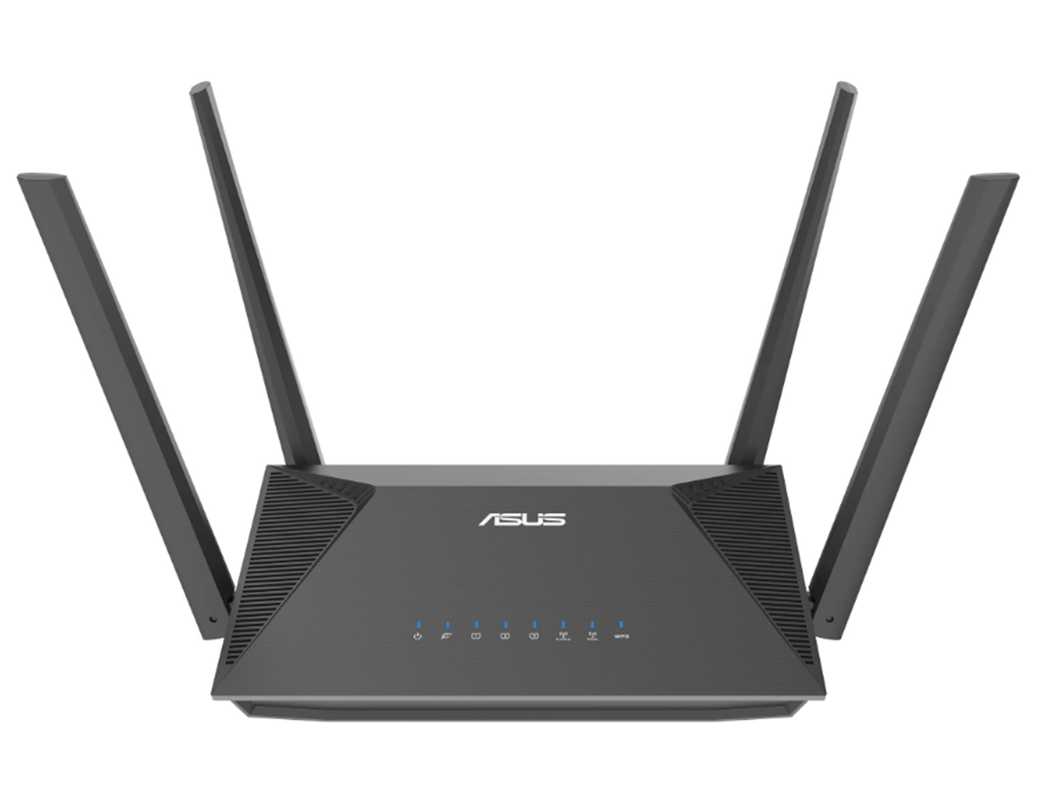
Step 1: Connect the router
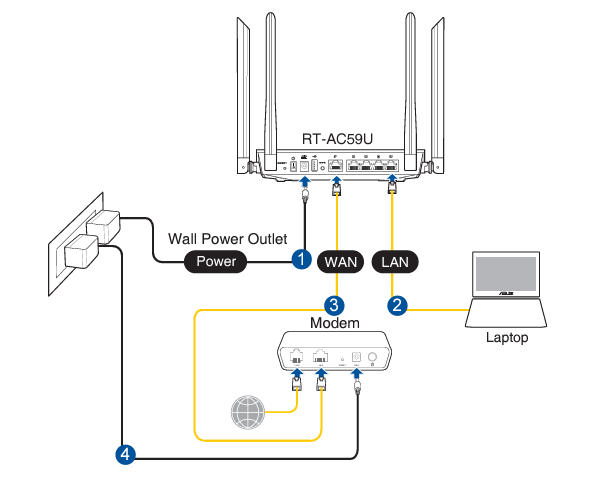
1.1 Turn off the ONT
Turn off your Optical Network Terminal (ONT), also known as the fibre box.
1.2 Connect the ONT to your router
Connect an Ethernet cable from the active Ethernet port on your ONT specified by WorldNet to the WAN (Internet) port on your router. The ONT port number can vary; use the port specified for your connection.
1.3 Turn on the ONT
Switch on the ONT and wait about 2 minutes for it to restart.
1.4 Turn on the router
Connect the power adapter to the router and switch it on.
Step 2: Connect your device
Choose one of the following connection methods.
Option 1: Wired connection
Connect your computer to an available LAN port on the router using another Ethernet cable. Use an Ethernet adapter if needed.
Option 2: Wireless connection
Connect to the Wi-Fi name (SSID) printed on the router label using its Wi-Fi password. If you have changed these details, use your current Wi-Fi name and password.
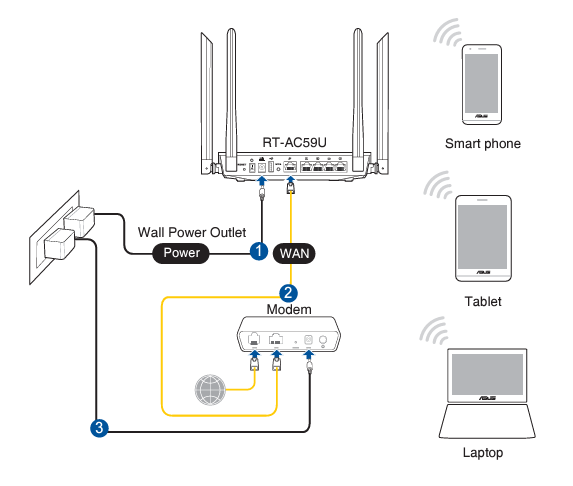
Note: Keep your device connected to the router by Ethernet or Wi-Fi throughout setup.
Step 3: Set up the router
WorldNet Internet Settings
Internet Connection Type
Dynamic IP / DHCP / Automatic IP / IPoE
VLAN
Disabled / Off
Choose the matching option shown by your router.
3.1 Open the setup page
Open http://www.asusrouter.com or the router address printed on its label in your browser. Common addresses include 192.168.1.1 and 192.168.50.1. If the router uses a different gateway address, use that address.
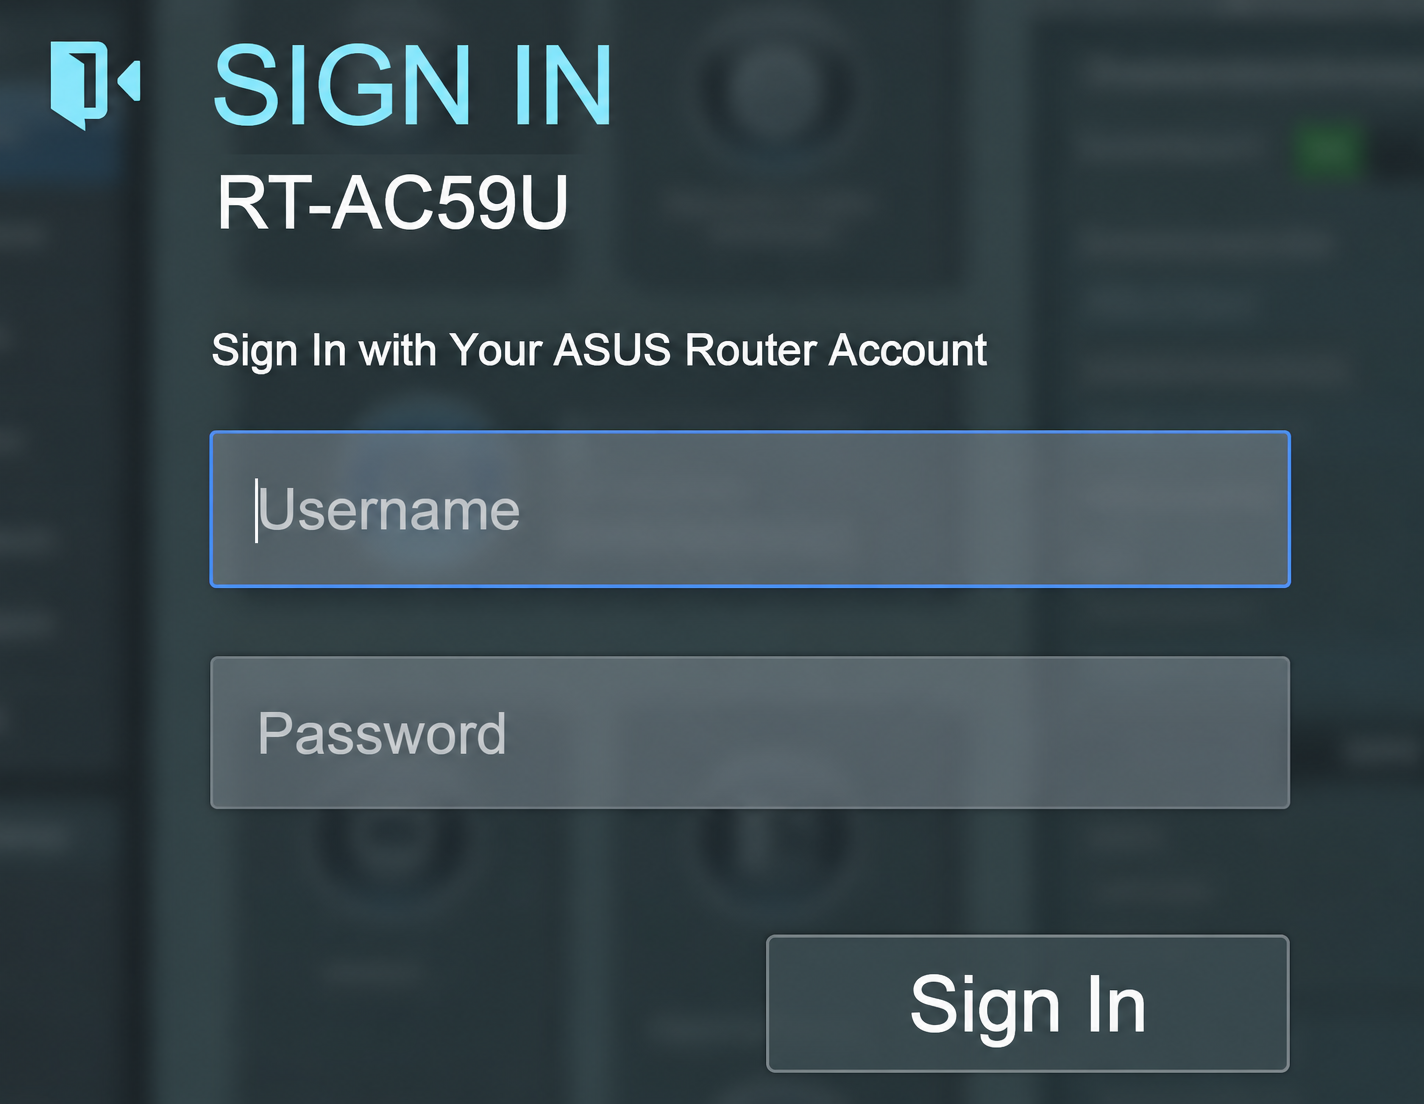
3.2 Log in to the router
The original RT-AC59U example uses admin for both username and password. Use your current login details if changed, or follow the first-time prompt to create them.
3.3 Choose Automatic IP
Start Quick Internet Setup. Choose Automatic IP (also called Dynamic IP or DHCP). No broadband username or password is needed. If Automatic IP is detected automatically, continue without entering ISP login details. Leave optional hostname and MAC cloning fields at their defaults unless WorldNet has supplied specific instructions, then select Next.
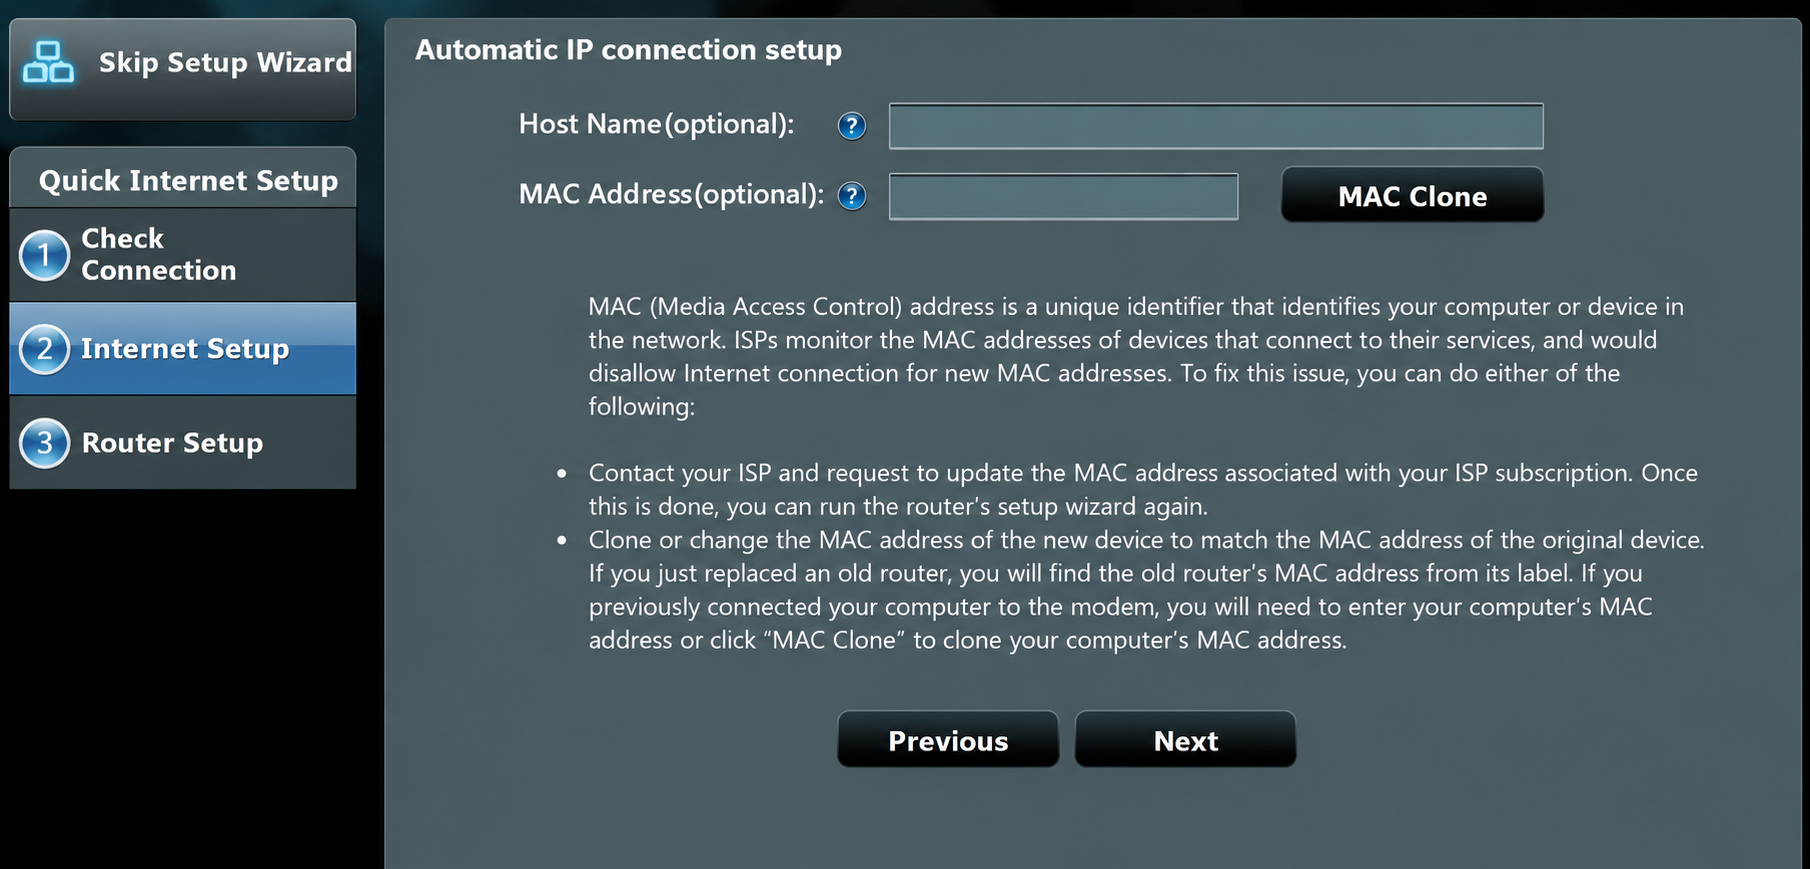
Note: WorldNet uses an untagged connection. Do not enable an ISP profile that adds VLAN tagging.
Note: If setup asks you to choose a WAN port, select the port connected to the ONT. Administrator-password and Wi-Fi prompts may appear in a different order. Follow the matching prompts; the WorldNet Internet Settings stay the same.
3.4 Create your Wi-Fi network
Enter your preferred 2.4 GHz and 5 GHz Wi-Fi names and strong passwords. Use WPA2-Personal / WPA2-PSK or a supported newer secure mode, then select Apply.
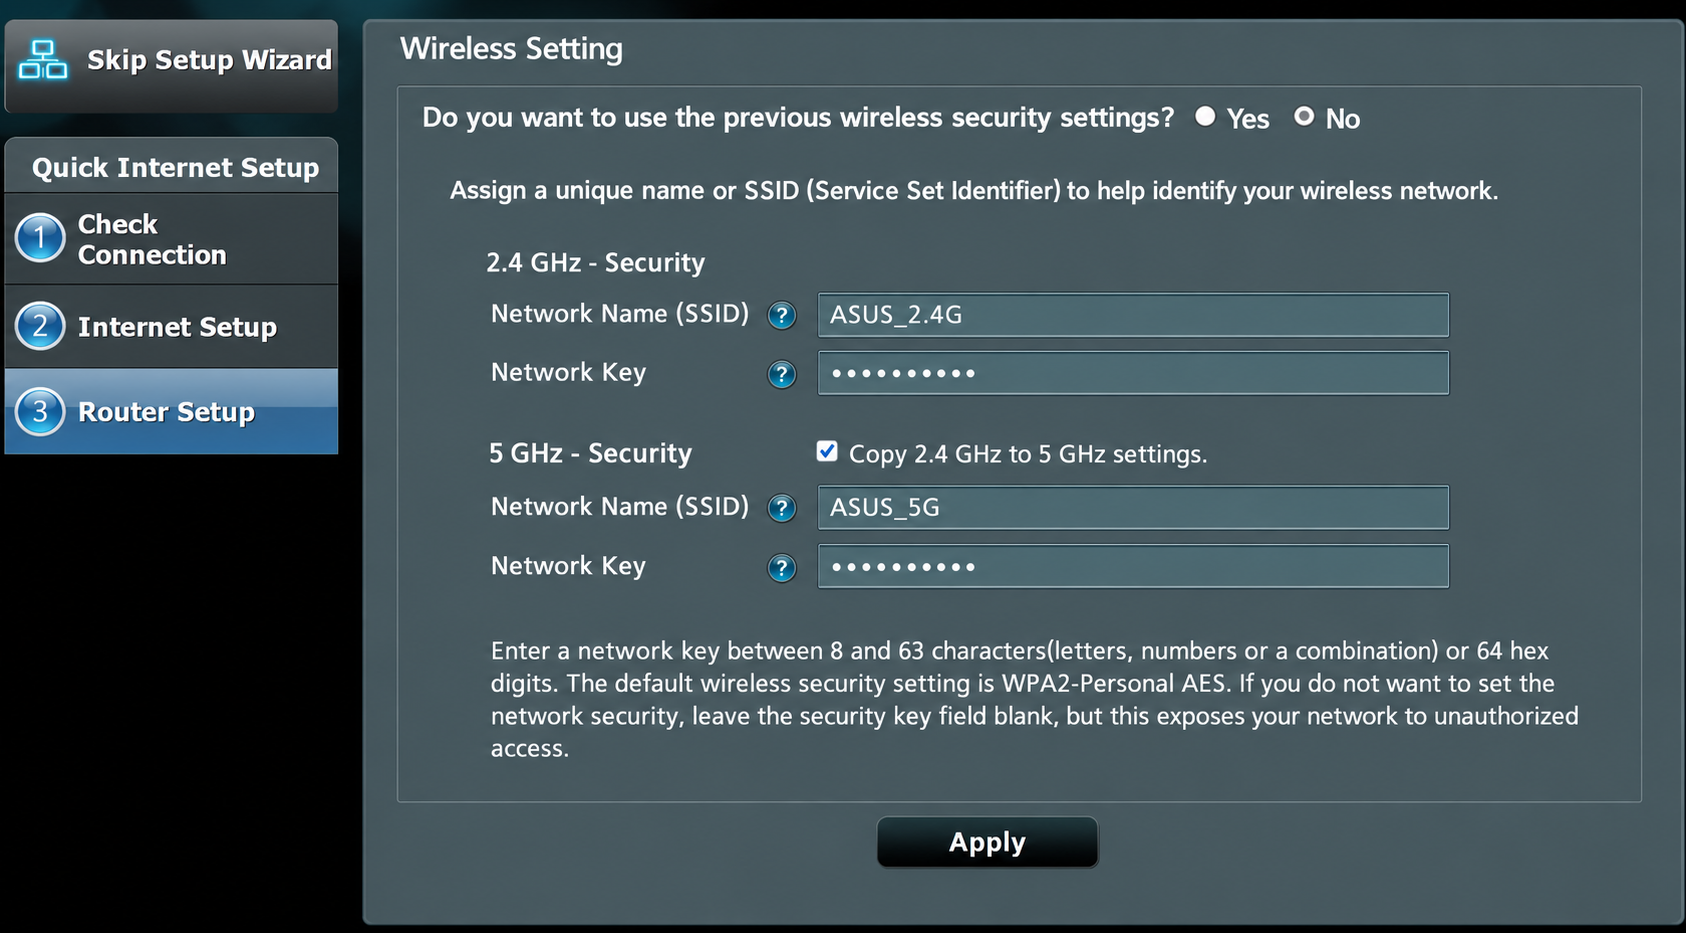
Note: Names and passwords shown in the original screenshots are examples. Use your own details.
3.5 Check the saved internet settings
If manual settings are needed, open WAN > Internet Connection. Set WAN Connection Type to Automatic IP, Enable WAN to Yes and Enable NAT to Yes. Keep automatic DNS and apply your changes.
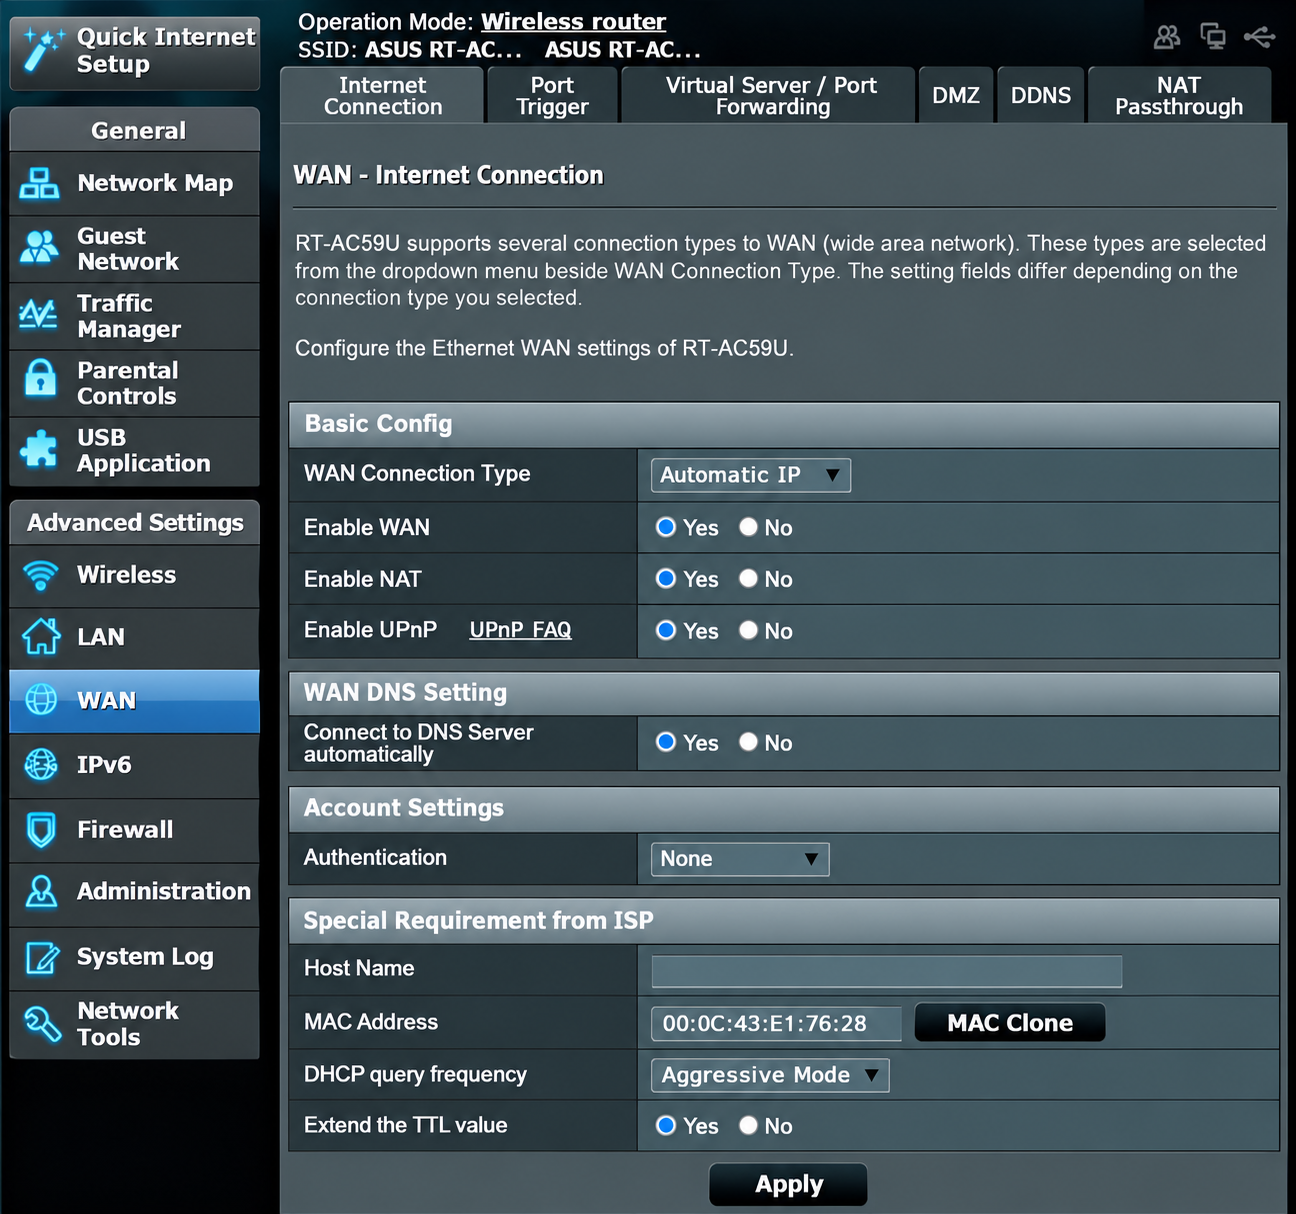
Open LAN > IPTV if available. Set Select ISP profile to None, then select Apply. Do not choose a provider profile or manual Internet VLAN tagging for WorldNet. UPnP is not required to establish the WorldNet connection and can remain at your preferred setting.
3.6 Change Wi-Fi settings later
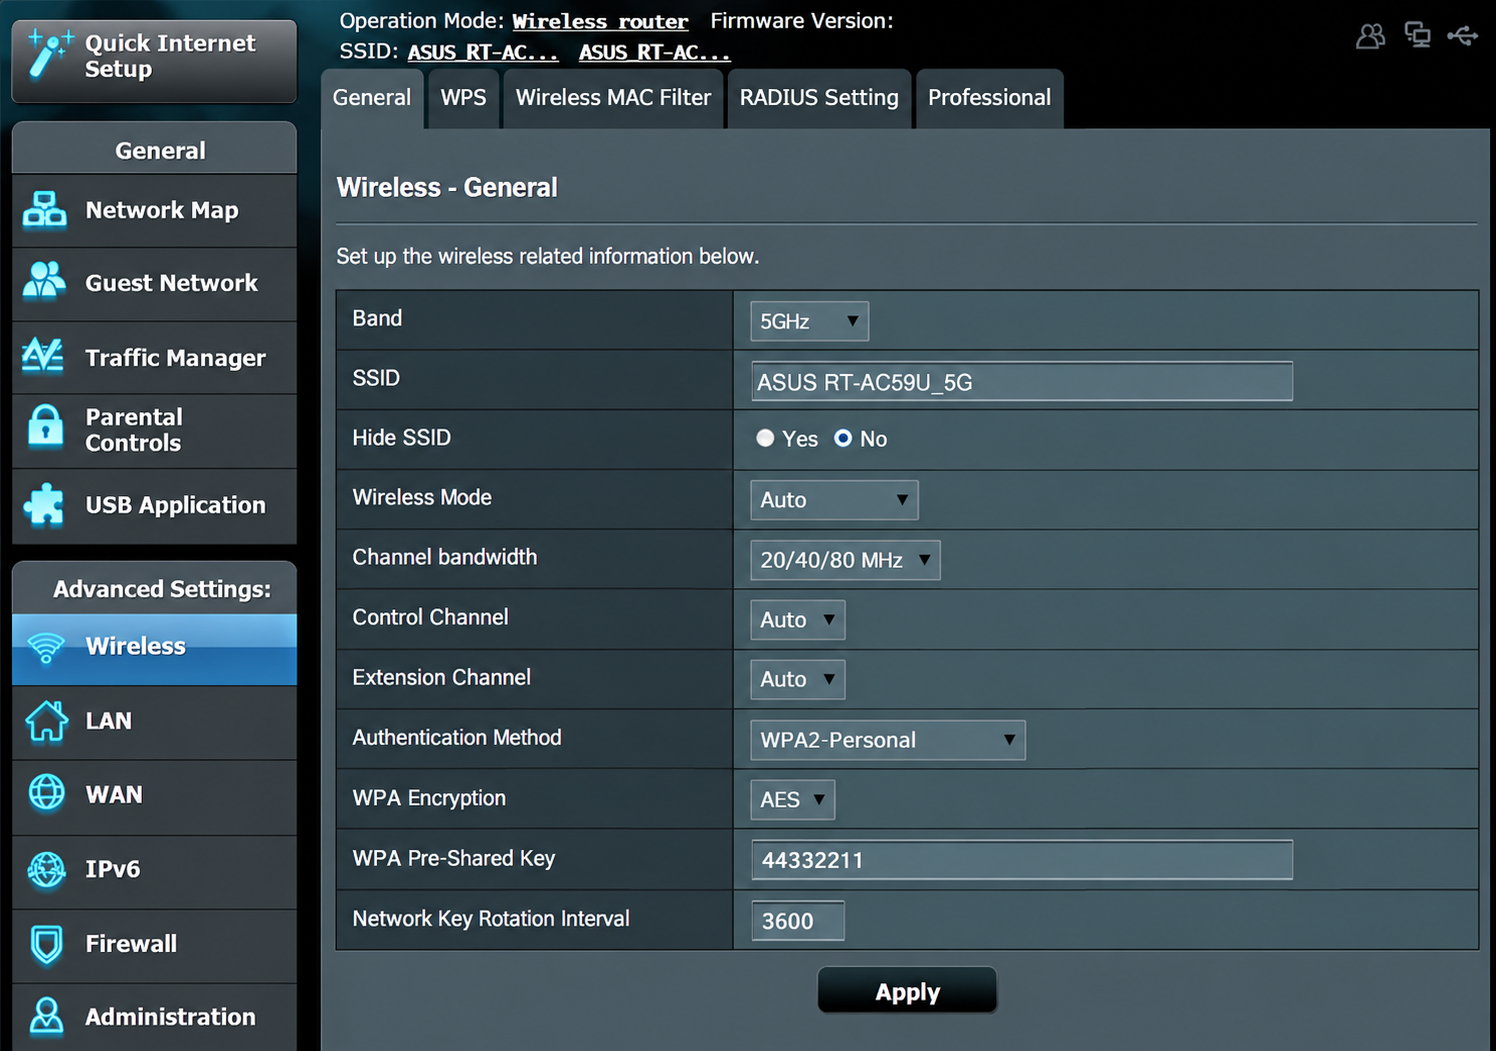
Open Wireless > General, choose the band, update the Wi-Fi name and password, then select Apply. Repeat for the other band and reconnect your devices.
Step 4: Test your internet connection
Connect your device to the router by Ethernet or Wi-Fi, then open a website to check that the internet works.
Note: If you test on a phone, temporarily turn off mobile data so you can confirm the connection is coming through Wi-Fi rather than 4G/5G.
Step 3: Set up with the ASUS Router app
WorldNet Internet Settings
Internet Connection Type
Dynamic IP / DHCP / Automatic IP / IPoE
VLAN
Disabled / Off
Choose the matching option shown by your router.
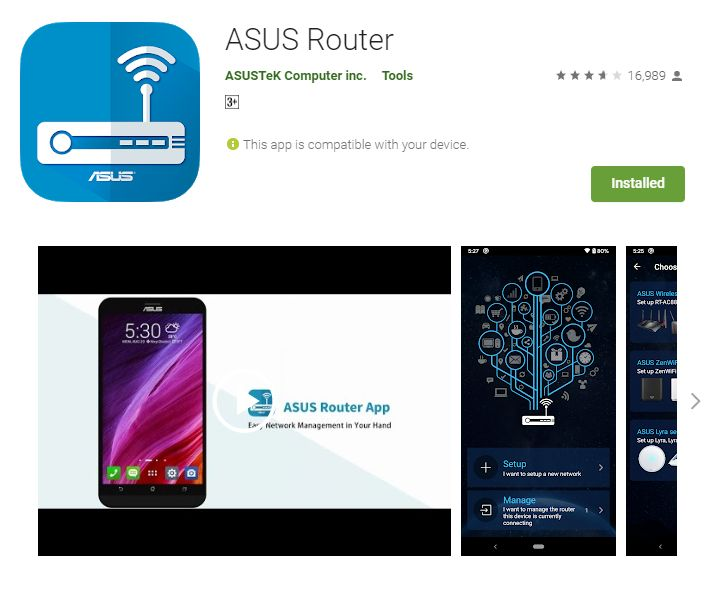
3.1 Install ASUS Router
Install ASUS Router from the Apple App Store or Google Play. Connect your phone to the router’s Wi-Fi network before opening the app.
3.2 Find your router
Open the app, tap Setup, choose ASUS Router or your detected router, and tap Start. Allow the local-network or device-discovery permissions needed for setup if prompted.
3.3 Select Automatic IP
Choose Automatic IP as the connection type and tap Next. Keep VLAN / IPTV tagging disabled for WorldNet.
3.4 Create your Wi-Fi network
Enter your Wi-Fi name and password, then tap Next. If you want different names for 2.4 GHz and 5 GHz, choose the separate-band option where available.
3.5 Create the router login
Enter an admin login name and a strong password, then tap Next. These credentials are used to manage the router and are separate from your Wi-Fi password.
3.6 Complete setup
Apply or save the settings if prompted. Reconnect your phone to the new Wi-Fi network if needed, then return to the app. If asked to enable remote connection, choose whether you want management from outside your home; it is optional for internet access.
Step 4: Test your internet connection
Connect your device to the router by Ethernet or Wi-Fi, then open a website to check that the internet works.
Note: If you test on a phone, temporarily turn off mobile data so you can confirm the connection is coming through Wi-Fi rather than 4G/5G.