
Set up your FRITZ!Box 7490 for WorldNet fibre using a computer and an Ethernet cable. Screens and menu names may vary with the installed FRITZ!OS version.
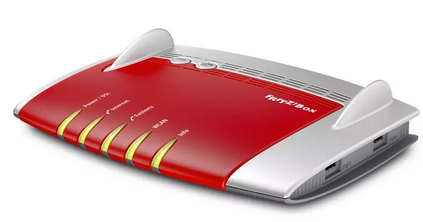
Step 1: Connect the router
1.1 Turn off the ONT
Turn off your Optical Network Terminal (ONT), also known as the fibre box.
1.2 Connect the ONT to your router
Connect an Ethernet cable from the active Ethernet port on your ONT specified by WorldNet to LAN 1 on your FRITZ!Box. The ONT port number can vary; use the port specified for your connection. On the FRITZ!Box, LAN 1 acts as the WAN port for this setup.
1.3 Turn on the ONT
Switch on the ONT and wait about 2 minutes for it to restart.
1.4 Turn on the router
Connect the power adapter to the FRITZ!Box and switch it on.
Step 2: Connect your computer
Use another Ethernet cable to connect your computer to an available LAN port on the FRITZ!Box. Your computer needs an Ethernet port or a suitable Ethernet adapter.
Note: Keep LAN 1 connected to the ONT. Use LAN 2, LAN 3 or LAN 4 for your computer, and keep this connection in place during setup.
Step 3: Set up the router
WorldNet Internet Settings
Internet Connection Type
Dynamic IP / DHCP / Automatic IP / IPoE
VLAN
Disabled / Off
Choose the matching option shown by your router.
3.1 Open the setup page
Open a web browser and enter http://fritz.box or http://192.168.178.1.
3.2 Log in to the router
Enter the router password to sign in.
Note: The original WorldNet example uses admin. If the password has been changed or your router has a different password, use its current password.
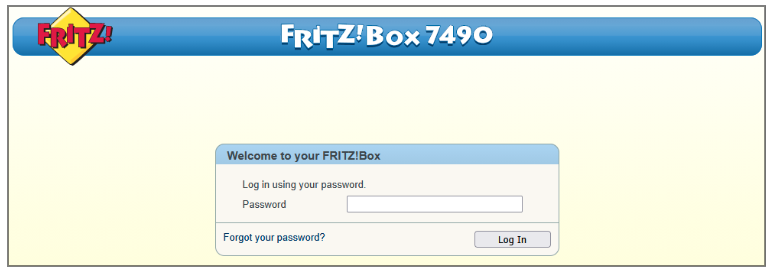
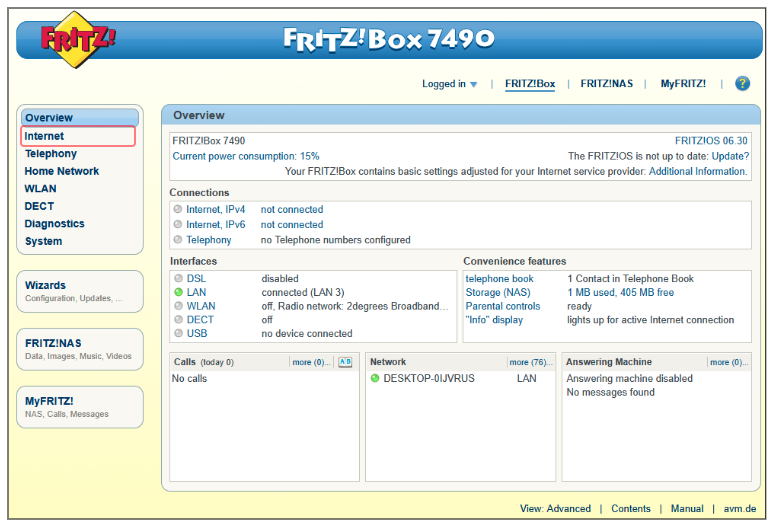
3.3 Open the internet settings
Go to Internet > Account Information.
3.4 Configure the WorldNet connection
Internet service provider: Other Internet service provider
Name: WorldNet
Connect via: External Modem or Router
Operating mode: Make own connection to the Internet
Account Information: No
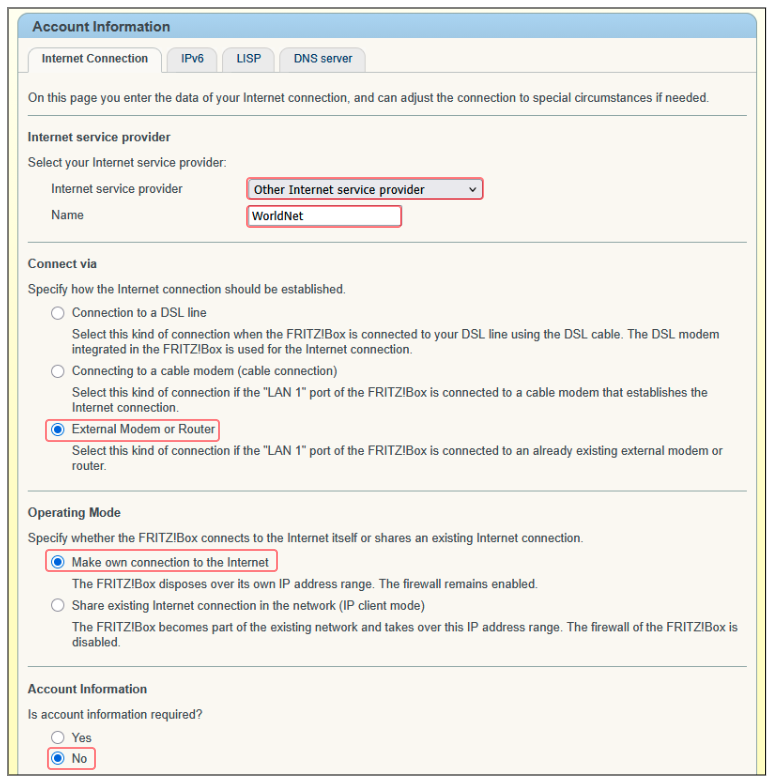
Note: For WorldNet, keep VLAN disabled. If a VLAN option appears under Change connection settings, leave Use VLAN for internet access unticked.
3.5 Set the connection speeds and apply
Under Connection Settings, select the row for your WorldNet Home Fibre plan. Upstream means upload; Downstream means download.
If the fields show kbit/s (Kbps), enter these numbers without commas:
| Home Fibre plan Download / Upload | Upstream (kbit/s) | Downstream (kbit/s) |
|---|---|---|
| 100 / 20 Mbps | 20000 | 100000 |
| 500 / 100 Mbps | 100000 | 500000 |
| 920 / 450 Mbps | 450000 | 920000 |
Note: If your router shows Mbit/s (Mbps) instead, divide the table values by 1000. For example, the 500 / 100 Mbps plan uses Upstream 100 and Downstream 500.
Where to enter these values
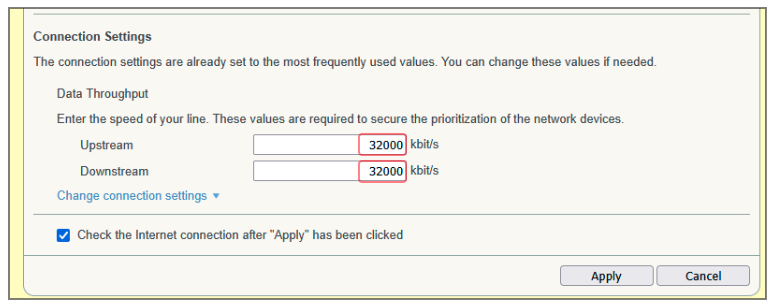
Note: The screenshot shows where to find the Upstream and Downstream fields. The 32000 values are examples only; replace them with the values for your plan from the table above.
Select Apply to save the settings.
Note: Match the plan currently active on your account. If you have a different or older plan, use its download and upload speeds. These entries configure the router; they do not change your plan or guarantee measured speeds.
3.6 Set your Wi-Fi network names
Go to WLAN > Radio Network.
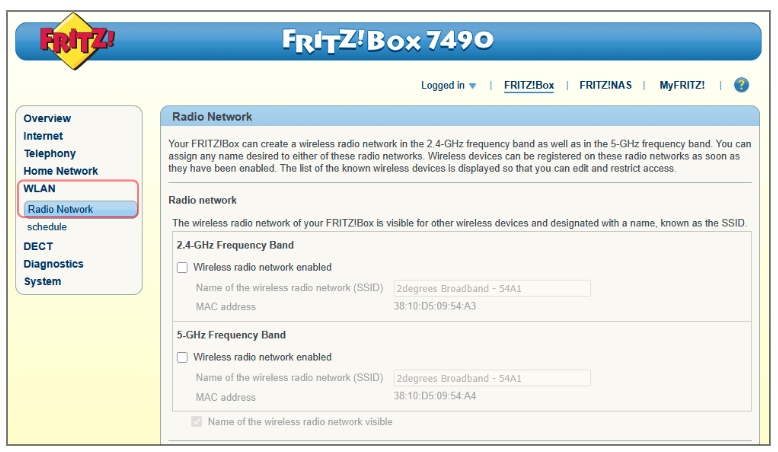
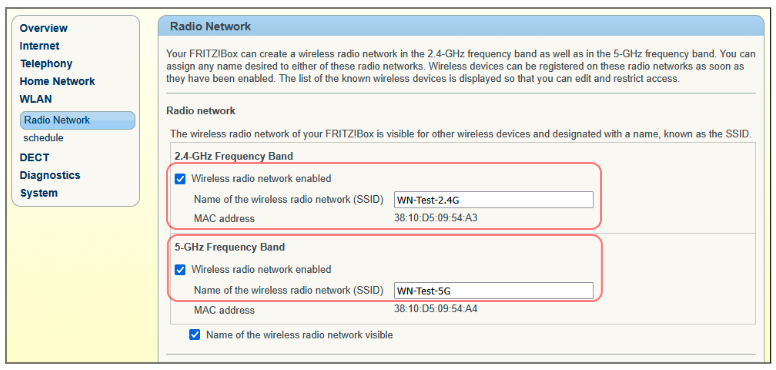
Enable the 2.4 GHz and 5 GHz frequency bands and enter your preferred Wi-Fi names (SSIDs). The screenshot uses WN-Test-2.4G and WN-Test-5G as examples.
3.7 Set your Wi-Fi password
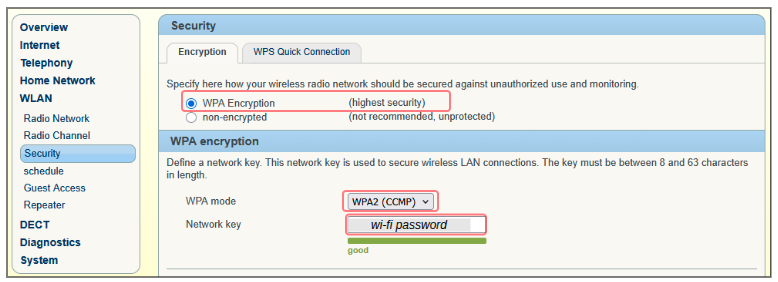
Go to WLAN > Security. Select WPA Encryption and WPA2 (CCMP), then enter your Wi-Fi password in Network key. Save or apply your changes.
Step 4: Test your internet connection
Open a website on your connected computer to check that the internet works. To test Wi-Fi, connect a device using your new Wi-Fi name and password, then open a website.
Note: If you test on a phone, temporarily turn off mobile data so you can confirm the connection is coming through Wi-Fi rather than 4G/5G.